History list
History list screen
The History list screen is displayed by switching the screen using the button on the Print Manager screen. The job history can be saved in a file in the CSV format (the administrator only).
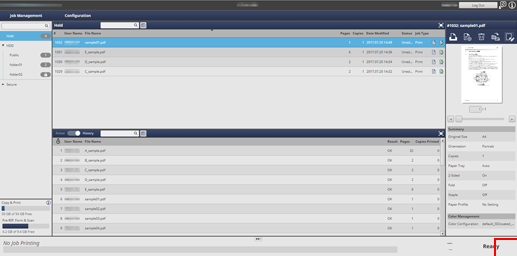
Items to be displayed vary depending on a job type.
Job Type | Copy | Scan | |||
Save | Save | ||||
Job Number | |||||
Job Type | |||||
User Name | |||||
File Name | |||||
Result | |||||
Pages | |||||
Pages Printed | |||||
Monochrome Pages Printed | |||||
Color Pages Printed | |||||
Copies Printed | |||||
Reception Date | |||||
RIP Start | |||||
RIP End | |||||
Print Start | |||||
Print End | |||||
Paper Size | |||||
Paper Type | |||||
For the print of a hold job, hold job (without RIP), secure job, or HDD job from the Job Management screen, RIP Start and RIP End are not displayed.
For secure jobs, the file name is indicated by an asterisk *.
The Job History only displays the RIPed pages as the number of pages. A job without RIP, inserted blank paper, or tab paper without printing is not RIPed, so it is not counted as the number of pages.
The method for counting the number of pages differs between the main body and Print Manager.
To adjust the column width, double-click the borderline between items above the header items, or drag the borderline while holding down it. The display width of the column is automatically adjusted according to the longer character strings: the strings of the item name or the strings of the item in the list. The adjusted display width is stored for each connected printer and it is maintained after a restart.
To sort the data by item, click the header of the column. You can switch between ascending order and descending order by clicking.
You can right-click on the header item to specify whether to show or hide items. For details, refer to Set List Items.
Reference
The administrator can download history. For details, refer to Download History.
Tips
If a job (a job with a prohibited password specified) is ended without being saved due to an error while Password Rules Setting is set to Enable in Quick Security Setting on the UTILITY menu, the execution result is displayed as Cancel.
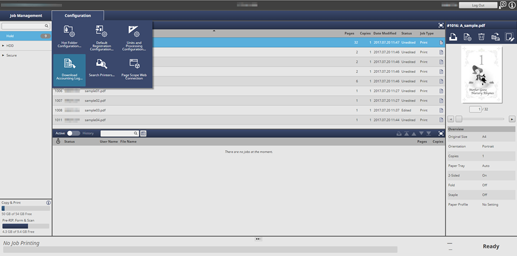
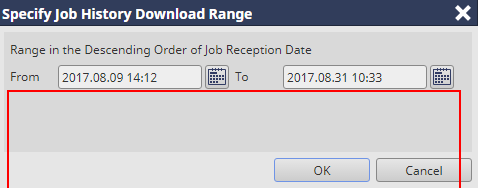
Download History
The administrator can download history.
Click Download Job History in Configuration.
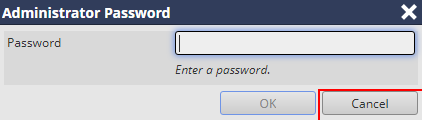
The Administrator Password screen is displayed.
Enter the Password, and click OK.
The Specify Job History Download Range screen is displayed.
Specify the range from the starting date to the ending date to receive records in the history to download, and click OK.
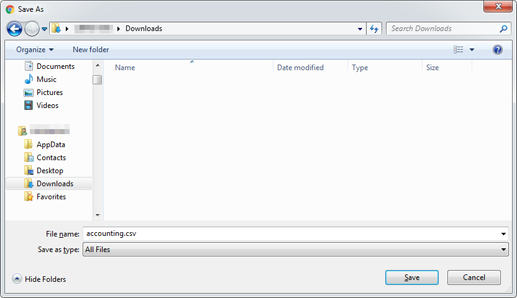
Select the destination to save and enter File name, and then click Save.
supplementary explanationThe displayed screen varies depending on the Web browser you use. This section describes an example using Google Chrome.