
Quality Optimization Screen
This section describes how to perform quality optimization operations. The Quality Optimization screen is displayed only when Integrated Color Care Unit IQ-501 is connected to this machine. The setting items here are the same as those of the Quality Optimization screen of the PS Plug-in driver, excluding Auto Inspection, Inspection Level, Reference Image, and Delete Image after Inspection. For details about the description of the common setting items, refer to Quality Screen.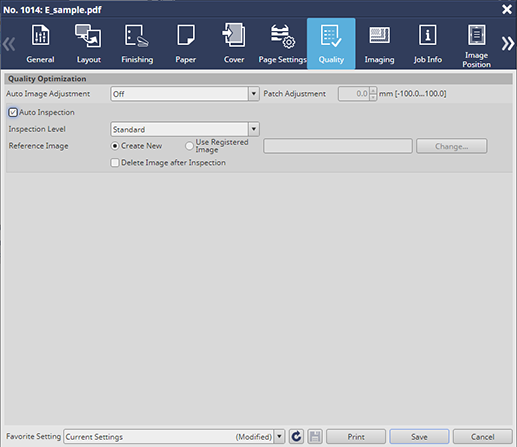
Item | Description |
|---|---|
Auto Image Adjustment | When you want to use the auto adjustment, select the desired one from Off, Position/Gradation, and Position. |
Patch Adjustment | This item is available when Position/Gradation is selected in Auto Image Adjustment. You can adjust the patch position outside paper if the positive value is specified in the range from -100.0 mm to 100.0 mm and inside paper if the negative value is specified in this range (the patch position moves in the crosswise direction). |
Auto Inspection | Select this check box to perform Auto Inspection. |
Inspection Level | Select Inspection Level from Essential, Standard, and Premium depending on the output purpose. |
Reference Image | When creating a new reference image to perform Auto Inspection, select Create New. When using an existing reference image to perform Auto Inspection, select Use Registered Image. The Reference Image Selection dialog box is displayed. Select the desired Reference Image. |
Delete Image after Inspection | Select this check box to delete a reference image when printing is finished. |