Creating a New Reference Image for Automatic Inspection
When newly performing automatic inspection, create a reference image before executing a job.
Hold a print job on this machine.
When printing via the printer driver, change the storage destination in the Workflow tab of the PS-Plugin driver.
For details about job holding, refer to Hold Job.
Press JOB LIST on the MACHINE screen to display the Hold Job screen.
Select the held print job, and press Job Ticket.
The Job Ticket Edit screen is displayed.
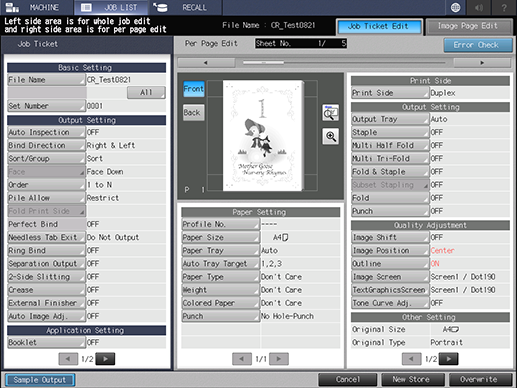
Press Auto Inspection.
The Automatic Inspection Setting window opens.
Set Inspection Setting to ON.
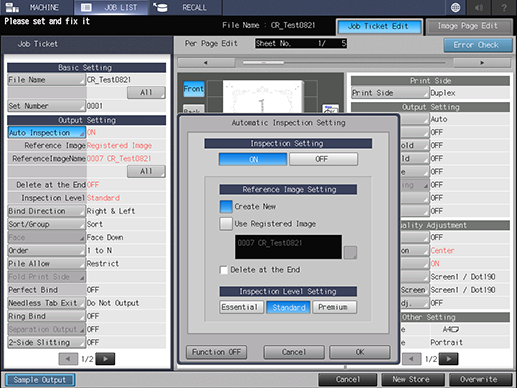
Select the Create New check box in Reference Image Setting.

Specify each item, and press OK to apply the setting.
When deleting Reference Image when printing is finished, select Delete at the End.
In Inspection Level Setting, specify the desired level depending on the output purpose.
Press New Store or Overwrite.
The setting is stored, and the display returns to the Hold Job screen.
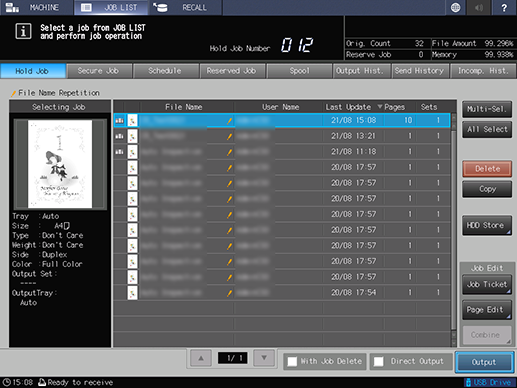
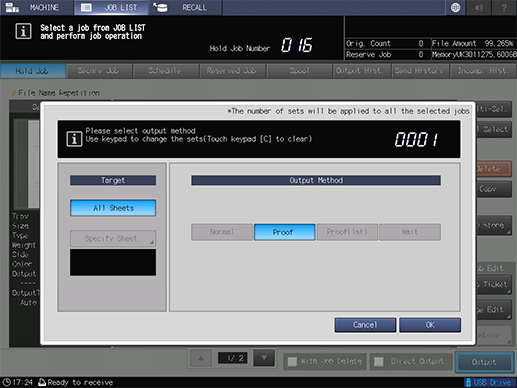
Press Output, and press OK.
One copy is output as Proof, and the reference image for automatic inspection is created. Check whether or not output paper is erroneous.
After output, press MACHINE; the Job Ticket screen opens.
Confirm the contents, and press Start on the control panel.
The print job starts, and Auto Inspection is performed. If an error is detected by the automatic inspection, it is displayed in IQ Detected Result. The Auto Inspection report can be viewed on this machine or by using Web Utilities of the Auto Inspection Unit UK-301.
Tips
Textured paper, blank insertion paper, punched paper, tab paper, and insertion paper are not targeted for automatic inspection.
When using numbered paper, paper with page numbers printed, or the date/time stamp function, select Inspection Excluding Area by reference to Automatic Inspection Area; you can perform automatic inspection.
Tips
Auto Inspection can also be configured using Print Manager.