
Checking the Automatic Inspection Level
You can check the inspection level on printing paper using automatic inspection test charts.
In the actual automatic inspection, the visibility (size and density) of spots on an image varies depending on the paper or image. When adjusting the inspection level, use test charts.
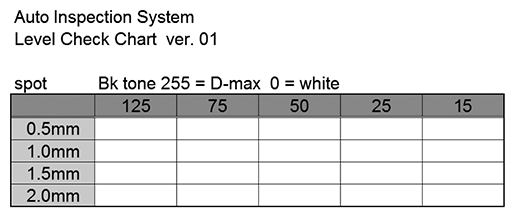
Use two types of automatic inspection test charts.
Reference chart: There are no dots in the table of the reference chart.
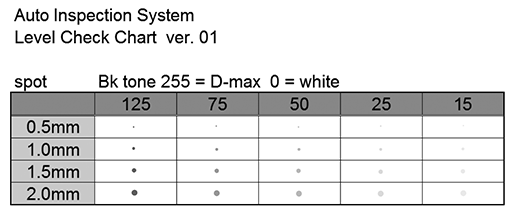
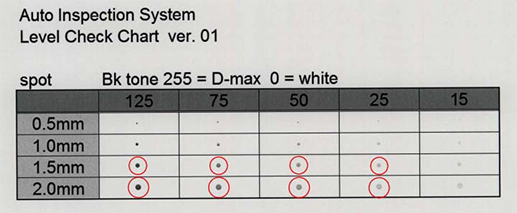
Inspection chart: The inspection chart includes dots in the table.
Tips
For details on how to obtain automatic inspection test charts, contact your service representative.
Set the details of automatic inspection.
Determine the basic settings and operation settings for automatic inspection. For details on the settings, refer to IQ Function Setting. In this step, configure the following settings.
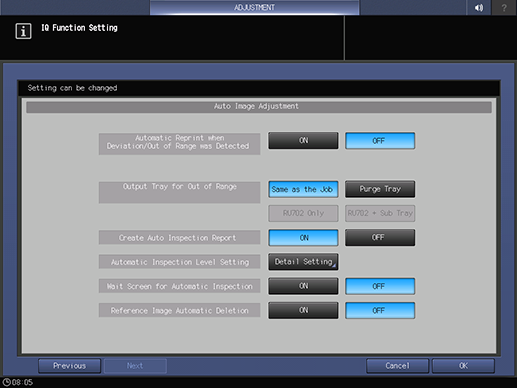
Automatic Reprint when Deviation/Out of Range was Detected: OFF
Output Tray for Out of Range: Same as the Job
Create Auto Inspection Report: ON
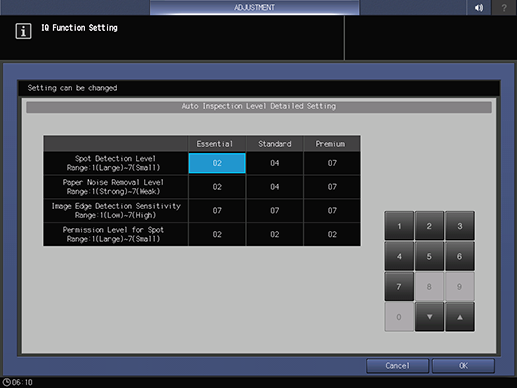
Configure settings in Auto Inspection Level Detailed Setting.
In this step, change each setting of Standard to the desired inspection level value.
Create a reference image using the reference chart.
Create a reference image following the procedure described in Creating a New Reference Image for Automatic Inspection.
Perform automatic inspection using the reference image created in step 3 and the inspection chart.
Perform automatic inspection following the procedure described in Selecting the Created Reference Image for Automatic Inspection. Select Use Registered Image in Reference Image Setting, and then select the reference image created in step 3. Also, select Standard in Inspection Level Setting.
Check the automatic inspection report.
Check the report following the procedure described in Confirming the Automatic Inspection Report. Check whether the levels specified in step 2 match the values framed in red.
NOTICE
The result of automatic inspection may vary depending on whether any subtle changes are made for each print job. Perform automatic inspection three to five times and then judge the combined results.
If adjustment is required, repeat steps 2 to 5.
NOTICE
Visibility may differ between the actual output original and the automatic inspection test chart. If necessary, configure settings again in Auto Inspection Level Detailed Setting.