
User Setting: Common Setting
The following features can be provided by switching the selection.
Menu item | Description | Setting value (: Default) | |
|---|---|---|---|
One Shot Message Indication Time | Select the time span to display a shot message, such as Original size is A4, in the message area of the touch panel. | 3 seconds, 5 seconds | |
Offset by Job Unit | Specify whether or not to offset the output sheets by job. | ON, OFF Also specify the number of jobs to be offset when selecting ON for this function (default: 1). | |
Continuation Print | Specify whether or not to output multiple reserve jobs in succession without stopping the machine at a job break. | Copy ON, Copy OFF, Printer ON, Printer OFF | |
Dark Tone Control | In order to adjust the quality of output image, select whether to automatically decrease the copying speed (Quality), prioritize the copying speed, or disable the control over the tone. | OFF, Quality, Performance | |
Icon Display for Dark Tone Control | Select whether or not to display the Dark Tone icon while the Dark Tone Control function is enabled. This function is available only when Quality or Performance is selected at Dark Tone Control. | ON, OFF | |
Dash Length(Page Stamp) | Select the length of the dash to be used in a style of Page No. in Stamp. | Long, Short | |
Center Crop Mark Trim Margin | Specify the space between the center crop mark and image area (center crop mark trim margin). | 0.0 mm-20.0 mm (Default: 1.0) | |
Schedule Cross Axis Unit (Default) | Select the unit of horizontal axis on the Schedule screen. | Timetable, Time Frame(m), Sheet Volume | |
Hold Job Status after Output (Default) | Select the default value to delete or save the data of hold job after outputting. | Delete, Save | |
Hold Job Direct Output (Default) | Select the default for the Direct Output check box under the Hold Job screen. ON selects the check box, and OFF clears the check box. After the change, turn OFF/ON the sub power switch to apply the setting. | ON, OFF | |
Offset Output Mode | Specify how to offset the output sets. | Change Out Pos., Stop Print, Change Out Pos. + Partition Paper (Tray1, Tray2, Tray3, Tray4, Tray5, Tray6, Tray7, Tray8, Tray9, Tray10, Tray11, PI1, PI2, PI-PFU1, PI-PFU2, PI-PFU3), Partition Paper (Tray1, Tray2, Tray3, Tray4, Tray5, Tray6, Tray7, Tray8, Tray9, Tray10, Tray11, PI1, PI2, PI-PFU1, PI-PFU2, PI-PFU3) | |
Needless Tab Paper Exit | Specify whether or not to automatically discharge the oddments of tabbed sheets loaded in a tray as a set for copy job. | ON, OFF | |
Remaining Memory (Measurement Unit) | Select the unit of displaying the remaining memory. | %, GB | |
Remaining Memory (Warning) | Select the percentage at which to give warning when the remaining memory is low. | 5% or Less, 10% or Less | |
[Proof Copy] 1 Set/1st Sheet Selection | If it is turned ON, the confirmation window is opened and you are asked to output one confirmation copy or to output only its first page when the Proof Copy is pressed. | ON, OFF | |
Temp. Down/Up Control before Print | Select whether to rotate the fusing roller before printing starts, in order to print at the appropriate temperature. | ON, OFF | |
Both Sides Rotate/Skew | If Disable is selected, the Rotate/Skew adjustment does not become available and does not function. | Enable, Disable | |
Stop when Water Tank Near Empty | Select whether to temporarily stop a job when the humidifier tank runs low on water. | Temporary Stop, NotTemporaryStop | |
Select Chart Type (Auto Image Adj.) | Select an automatic image adjustment chart for each paper weight. The unit of weight can be switched. This option is displayed when Integrated Color Care Unit IQ-501 is mounted on the machine. | 40-49g/m2/10-13 lb Bond: Type1, Type2 50-54g/m2/14-15 lb Bond: Type1, Type2 55-61g/m2/16-17 lb Bond: Type1, Type2 62-74g/m2/18-19 lb Bond: Type1, Type2 75-80g/m2/20-21 lb Bond: Type1, Type2 81-91g/m2/22-24 lb Bond: Type1, Type2 92-105g/m2/25-28 lb Bond: Type1, Type2 106-135g/m2/29-36 lb Bond: Type1, Type2 136-162g/m2/37-43 lb Bond: Type1, Type2 163-216g/m2/44-57 lb Bond: Type1, Type2 217-256g/m2/58-68 lb Bond: Type1, Type2 257-300g/m2/69-81 lb Bond: Type1, Type2 301-350g/m2/82-93 lb Bond: Type1, Type2 Change Unit | |
Auto Image Adjustment Deviation Check | Select whether to automatically check a deviation. If you select ON, enter the specified value of a deviation. This option is displayed when Integrated Color Care Unit IQ-501 is mounted on the machine. | ON (ON: 0.5 mm-10.0 mm, Default: 2.0), OFF | |
Operation after Deviation/Out of Range was Detected | Specify the operation to be performed when inappropriate output paper is detected. You can specify whether to stop this machine immediately or only when the number of detected errors exceeds the standard. * When the standard value for the number of detected errors is set to 0, and Automatic Reprint when Deviation/Out of Range was Detected is set to OFF, this machine will not stop even if the number of detected errors increases. This option is displayed when Integrated Color Care Unit IQ-501 is mounted on the machine. | Stop, Continue Output, Detection Count (0 ~ 10 times) | |
Partition Paper when Deviation/Out of Range was Detected | Configure a setting to insert partition paper when inappropriate output paper is detected. When inserting, select the paper tray to load partition paper into. This option is displayed when Integrated Color Care Unit IQ-501 is mounted on the machine. | ON, OFF, Partition Paper (Tray1, Tray2, Tray3, Tray4, Tray5, Tray6, Tray7, Tray8, Tray9, Tray10, Tray11) | |
Automatic Reprint when Deviation/Out of Range was Detected | Configure a setting to perform reprinting when inappropriate output paper is detected. When reprinting is performed, paper in the machine is output once, so a page order error involving output paper does not occur. This option is displayed when Integrated Color Care Unit IQ-501 is mounted on the machine. | ON, OFF | |
Output Tray for Out of Range | Specify the tray to output paper that does not satisfy the standard. You can combine the Purge Tray of the Relay Unit RU-702 with a sub tray of the optional output unit mounted later, and also select the same tray for a job. * Paper cannot be output to the sub tray of Folding Unit FD-503, Large Capacity Stacker LS-506, or Saddle Stitcher SD-506. Also, paper cannot be output to the sub tray of Saddle Stitcher SD-513 when the Multi Tri-Fold, Fold & Staple, or Half-Fold mode is being used. * When a paper output enabled option is not connected to Relay Unit RU-702 or later, the button of RU702 + Sub Tray is grayed out. This option is displayed when Integrated Color Care Unit IQ-501 is mounted on the machine. | Same as the Job, Purge Tray (RU702 Only, RU702 + Sub Tray) | |
Create Auto Inspection Report | Configure a setting to create an automatic inspection result report. When inappropriate output paper is not discharged automatically, the user deals with the inappropriate output paper based on the report. This option is displayed when Auto Inspection Unit UK-301 is mounted. | ON, OFF | |
Automatic Inspection Level Setting | Adjust the detection standard for automatic inspection. There are three levels: Essential, Standard, and Premium, for each of which you can adjust the detection standard. This option is displayed when Auto Inspection Unit UK-301 is mounted. | Detail Setting | |
Spot Detection Level | Specify the reference value of the spot size. A spot that is over the reference size value is detected as an image failure. | Range: 1(Large) ~ 7(Small) | |
Paper Noise Removal Level | Specify the reference value of spot density. A spot that is over the reference density value is detected as an image failure. | Range: 1(Strong) ~ 7(Weak) | |
Image Edge Detection Sensitivity | Specify the sensitivity of the inspection area around the edge of the image. A slight image misalignment may occur around the edge of the image even if no image failure is detected; therefore, if the sensitivity is set to a higher level, it may lead to frequent reprinting. | Range: 1(Low) ~ 7(High) | |
Permission Level for Spot | Specify the reference value that permits an image spot detected in a reference image. An image failure may be slipped into a reference image when it is created. If automatic inspection is performed in this status, the inspection image is detected as an error even if there is "no error". In such a case, reduce this reference value; an image failure of a reference image is permitted to a certain degree, which enables smooth printing. | Range: 1(Large) ~ 7(Small) | |
Wait Screen for Automatic Inspection | Set the automatic inspection on the Wait screen. When outputting a print job for Direct Print and such without temporarily saving it, input the job in Wait mode; you can set the automatic inspection. This option is displayed when Auto Inspection Unit UK-301 is mounted. | ON, OFF | |
Reference Image Automatic Deletion | Configure a setting to automatically delete the reference image that is created for automatic inspection. When the amount of available reference image memory is not sufficient, the reference image of the oldest update date and time in Reference Image List 1 is deleted automatically. This option is displayed when Auto Inspection Unit UK-301 is mounted. | ON, OFF | |
NOTICE
Reference Image Automatic Deletion is set to ON by default. When you do not want to automatically delete a reference image, set to OFF.
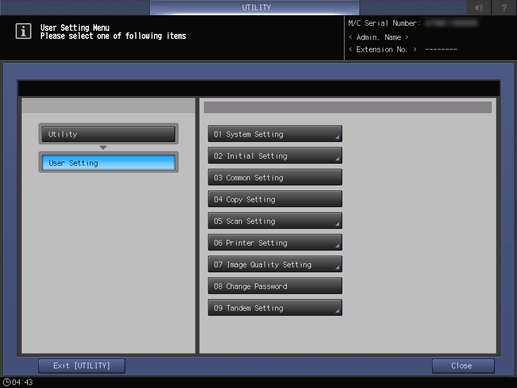
Follow the procedure on Displaying the User Setting Menu Screen to display the User Setting Menu screen.
Press Common Setting on the User Setting Menu screen.
Press one option for each item.
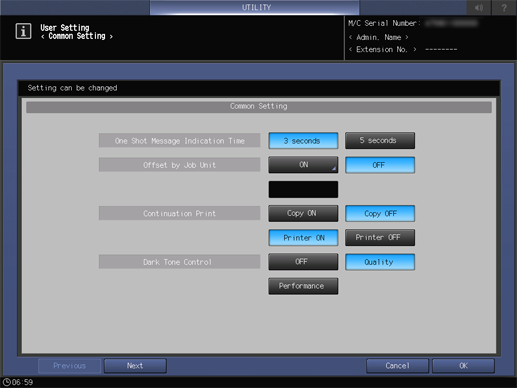
supplementary explanationThis setting screen has 7 pages to go through. Use Next or Previous to scroll.
supplementary explanationSelecting ON for Offset by Job Unit displays the Offset by Job Unit screen. Use the touch panel keypad to specify the number of jobs to be offset, then press OK. Available range is from 1 to 9,999.
supplementary explanationIf Change is selected in Select Chart Type (Auto Image Adj.), the Select Chart Type for Each Weight screen is displayed. Select an automatic image adjustment chart for each paper weight, and press OK.
supplementary explanationIf you select ON in Auto Image Adjustment Deviation Check, the Auto Image Adjustment Deviation Check screen is displayed. Enter the specified value of a deviation using the keypad on the screen, then press OK. Available range is from 0.5 to 10.0.
supplementary explanationWhen Continue Output is selected in Operation after Deviation/Out of Range was Detected, Detection Count become available. Set Detection Count and press OK. The available number of deviation detection times is from 0 to 10.
supplementary explanationWhen ON is selected in Partition Paper when Deviation/Out of Range was Detected, Partition Paper become available. Specify the paper tray to feed, and press OK.
supplementary explanationIf you select Detail Setting in Automatic Inspection Level Setting, the Auto Inspection Level Detailed Setting screen is displayed. Enter the specified detection standard using the keypad on the screen, then press OK. Available range is from 1 to 7.
Press OK to complete the setting.
supplementary explanationTo cancel the change, press Cancel.
In either case, the screen returns to the User Setting Menu screen.