
Audit Log
Audit Log Transmission
All the saved audit log data is automatically transmitted to the specified WebDAV server. If necessary, it can be transmitted manually at the desired time(s).
Audit log address setting
When the Enhanced Security mode is set to ON, specify the address of the WebDAV server you want to transmit audit logs to.
Tips
Audit logs cannot be printed out or output to a USB flash drive.
Follow the procedure on Displaying the Administrator Setting Menu Screen to display the Administrator Setting Menu screen.
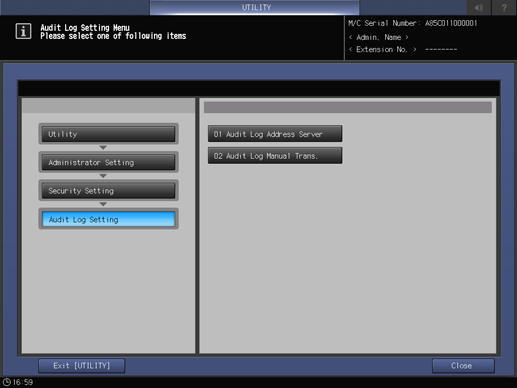
On the Administrator Setting Menu screen, press Security Setting - Audit Log Setting - Audit Log Address Server.

In Audit Log Trans., select ON, then configure the WebDAV server setting.
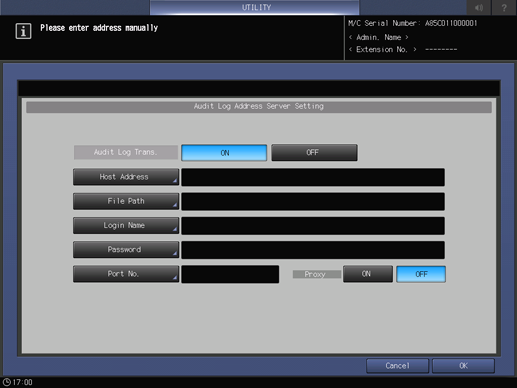
For details about the WebDAV server setting, refer to Registering a WebDAV Server as a Destination.
Press OK.
Audit log manual transmission
Audit logs are automatically transmitted in normal use; however, they can be transmitted manually as needed.
Follow the procedure on Displaying the Administrator Setting Menu Screen to display the Administrator Setting Menu screen.
On the Administrator Setting Menu screen, press Security Setting - Audit Log Setting - Audit Log Manual Trans..
Press Transmission.

Press Yes.
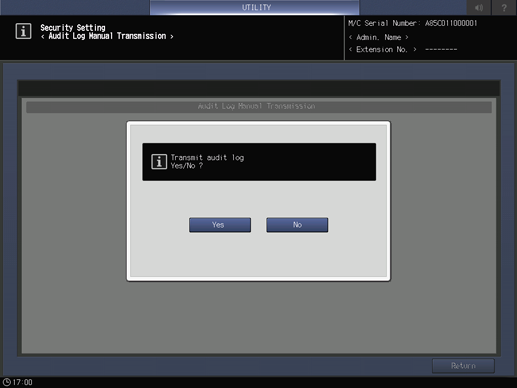
When the Transmitted audit log message is displayed, the transmission is completed.
Analyzing audit log
Audit log needs to be analyzed by the administrator regularly (once per month), or when the data saved in the machine are illegally accessed or even tampered.
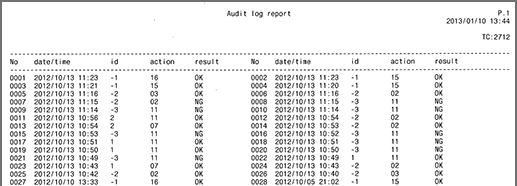
Audit log information
The audit log contains the following information:
date/time: registers date and time of the operation that resulted in the creation of a log entry.
id: specifies person who made the operation, or subject for security protection.
-1: operation by customer engineer (CE)
-2: operation by the administrator
-3: operation by the unregistered user
Other integer: indicates subjects for security protection.
User ID: numbers from 1 to 1000.
Secure user ID (specified using a computer at secure printing): numbers from 1 to 5 digits (specified by user).action: indicates number that specifies the operation.
You can check the details in the List of audit log items shown below.result: records result of the operation.
For password authentication, success/failure is indicated as OK/NG.
For operations without password authentication, all log entries are indicated as OK.
List of audit log items
Stored action | Operation | Audit ID | Result |
|---|---|---|---|
User authentication and identification | |||
1 | Execute CE authentication | CE ID | OK/NG |
5 | Change or register the CE password | CE ID | OK |
2 | Execute administrator authentication | Administrator ID | OK/NG |
6 | Change or register the administrator password | CE ID or administrator ID | OK |
11 | Execute user authentication | User ID *1 or unregistered ID *2 | OK/NG |
User modification | |||
7 | Create user by administrator | User ID | OK |
8 | Change/Register user password by administrator | User ID | OK |
9 | Delete user by administrator | User ID | OK |
10 | Change user attribute by administrator | User ID | OK |
12 | Change the user attributes according to the user (change the user password, etc.) | User ID | OK |
Use of management functions and change of security setting | |||
3 | Set/Change Enhanced Security mode | Administrator ID | OK/NG |
19 | Change HDD lock password | Administrator ID | OK |
41 | Change the password rules setting | Administrator ID | OK |
42 | Change the network setting | Administrator ID | OK |
43 | Change the service login allow setting | Administrator ID | OK |
Usage of management functions and security audit | |||
4 | Audit log output (Manual and automatic modes) | Administrator ID | OK/err No |
44 | Change the audit log transmission address setting | Administrator ID | OK |
Use of management functions and encryption support | |||
45 | Start the HDD encryption function | Unregistered ID | OK |
46 | Change the HDD encryption setting | Administrator ID | OK |
47 | Change the HDD encryption password | Administrator ID | OK |
Usage of management functions and protection of security function operating environment | |||
49 | Execute ISW | CE ID or administrator ID | OK/NG |
50 | Firmware diagnosis | Administrator ID or unregistered ID | OK/NG |
51 | Device diagnosis | Administrator ID or unregistered ID | OK/NG |
Time change (Use of management functions and protection of security function operating environment) | |||
20 | Date/time setting | User ID | OK |
Start and exit of audit function | |||
52 | Power-on (Start of audit function) | Unregistered ID | OK |
53 | Power-off (Exit of audit function) * Sub power | Unregistered ID | OK |
54 | Power-off (Exit of audit function) * Main power | Unregistered ID | OK |
End of job and operation | |||
16 | Delete store job | User ID | OK |
21 | Print copy job | User ID or unregistered ID | OK/NG |
22 | Store copy job | User ID or unregistered ID | OK/NG |
23 | Print print job | User ID or unregistered ID | OK/NG |
24 | Store print job | User ID or unregistered ID | OK/NG |
25 | Execute scan job | User ID or unregistered ID | OK/NG |
26 | Print store job | User ID or unregistered ID | OK/NG |
27 | Change or restore store job (move or copy) | User ID or unregistered ID | OK/NG |
28 | Recall store job | User ID or unregistered ID | OK/NG |
29 | Output store job file | User ID or unregistered ID | OK/NG |
*1: Audit log ID is saved as user ID when user authentication is successfully made, or when password inconformity occurs with a registered user name.
*2: Audit log ID is saved as unregistered user ID when authentication failure occurs with an unregistered user name.
The purpose of analyzing the audit log is to understand the following and implement countermeasures:
Whether or not data was accessed or tampered with
Subject of attack
Details of attack
Result of attack
For specific analysis methods, refer to the following description.