
Adjust the Tone Curve: Each Color
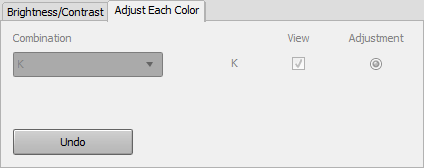
Adjust Each Color Tab
The each color adjustment uses Adjust Each Color tab of Tone Curve Adjustment screen.
The Adjust Each Color tab is composed as follows;
Name | Description |
|---|---|
Combination | Lets you select CMYK, CMY/K, or C/M/Y/K. When you select CMYK, you can adjust the consolidated tone curve of CMYK. When you select CMY/K, you can adjust the consolidated tone curve of CMY and the tone curve of K. When you select C/M/Y/K, you can adjust the tone curves of each color of CMYK. This function is not available on the machine. |
View | This is a check box for displaying/hiding the tone curve per item of the combination selected from Combination. According to the selection from Combination, the number and target (color) of the check box differ. This function is not available on the machine. |
Adjustment | This is a radio button for selecting whether or not you execute the tone curve adjustment per item of the combination selected from Combination. According to the selection of Combination, the number and target (color) of the radio button differ. This function is not available on the machine. |
Undo | Discards the current settings of Adjust Each Color tab, and returns to the last saved settings. |
Add and Adjust Points
Click Adjust Each Color tab on the Tone Curve Adjustment screen.
Adjust Each Color tab appears.
Adjust the tone curve by operation of points in the curve view area.
supplementary explanationWhen you execute confirmation print to confirm the result of tone curve adjustment, go to Confirming the Result of the Adjustment.
Adjust with Point and Base Point
When you select Adjust Each Color tab, you can use the point/base points to make adjustments.
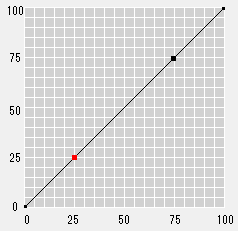
The point (small, black square) appears at both ends of the curve view area. You can adjust the tone curve by dragging and moving this point.
You can also add the point by clicking on the curve. You can adjust the tone curve by dragging and moving this added point (small, red square).
In addition, the position of 25%, 50%, and 75% may be added automatically on the curve as base points according to the settings of Brightness/Contrast tab. You can also adjust the tone curve by dragging and moving the base point.
These points and base points can be used for adjustment of the tone curve as follows;
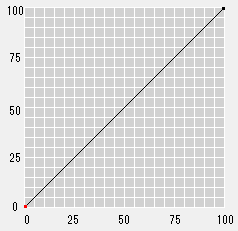
Points at both ends can be dragged up and down to change the overall inclination. Then, you can adjust the whole range of the output values.
Before Adjustment | After Adjustment |
|---|---|
|
|
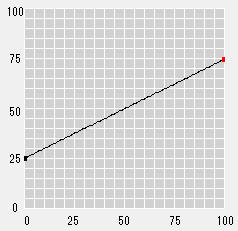
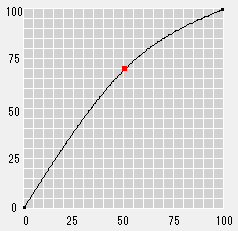
The 0 point (beginning point) and 100 point (ending point) cannot be moved to the left or the right, but the adjacent point can be moved to 1% or 99%. When you drag the added point which is adjacent to the end point, you can set the adjacent section from the both ends nearly even (at output value).
Before Adjustment | After Adjustment |
|---|---|
|
|
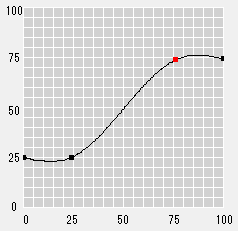
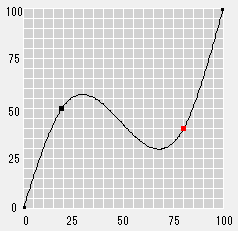
Dragging the added/base points upward/downward/left/right, you can set the circular arc or an S-shaped curve that is centering on this point. When the whole curve is made to circular arc, the brightness goes up. When the S-shaped curve is enlarged, the contrast becomes strong. You can drag to left or right, within the range from the next of the previous point (value of the position is 1% greater) to before the next point (value of the position is 1% less).
Before Adjustment | After Adjustment |
|---|---|
|
|
You can set the complex tone curve by moving/adding the point mentioned above.
You can add up to 15 points.
You cannot select the multiple points at the same time.
Instead of dragging, you can press arrow keys to move a point up or down.
To delete an added point, select the point and press the Delete key. You can also click
 to delete an added point. However, you cannot delete the beginning point and the ending point.
The spin boxes display the values of the selected point. When you select the point and you enter the value into the input boxes respectively, you can move the selected point to specified position.