
Specify Information of a Job and a Color Bar
This section describes how to configure items to be printed outside the image area.
Click File - Color Verification.
Color Verification screen appears.
Click The Color Setting Information, then select items.
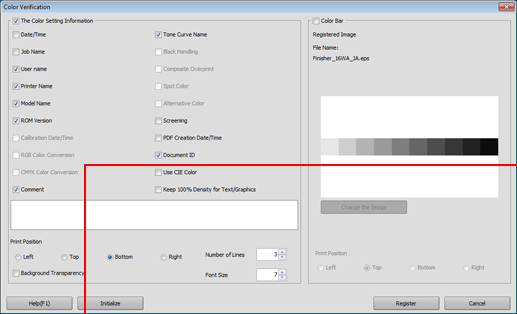
supplementary explanationThe following functions are not available on the machine.
Calibration Date/Time
RGB Color Conversion
CMYK Color Conversion
Black Handling
Composite Overprint
Spot Color
Alternative Color
supplementary explanationTo specify the print position, select an option button in Print Position.
supplementary explanationTo specify the number of printing lines, select the number in Number of Lines. (1 to 5)
supplementary explanationTo change the font size, specify the numeric value in Font Size.
Select Color Bar.
supplementary explanationThe image that is registered as the color bar is displayed.
supplementary explanationTo use another file, click Change the Image and then specify an eps file.
supplementary explanationTo specify the print position, select an option button in Print Position.
Click Register.
The setting is registered in the image controller.
Color Verification is closed to return to Color Default Settings screen.
supplementary explanationTo cancel the setting and return to the default, click Initialize.