
Density Balance Auto. Adjustment
This adjustment has the following three types depending on the system configuration.
Integrated Color Care Unit IQ-501 | Scanner (Original Glass) | Device for adjustment |
|---|---|---|
Mounted | Mounted | Integrated Color Care Unit IQ-501 |
Not mounted | ||
Not mounted | Mounted | Scanner (Original Glass) |
Not mounted | Colorimeter |
Tips
When Integrated Color Care Unit IQ-501 is provided, adjustment is performed automatically. To print charts, select the appropriate screen.
When Integrated Color Care Unit IQ-501 and the scanner (Original Glass) are not provided, use your spectrophotometer to measure output charts, and enter measurement parameters for adjustment.
When Integrated Color Care Unit IQ-501 is provided:
Output density balance charts from the machine, and automatically adjust the density balance using Integrated Color Care Unit IQ-501.
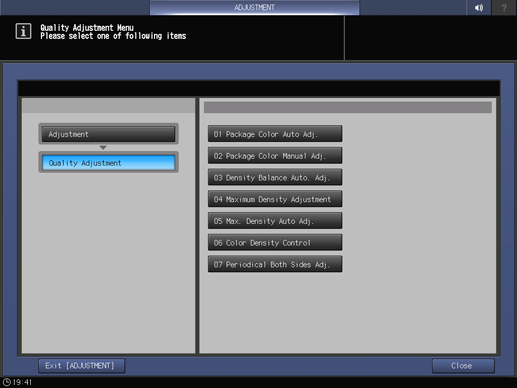
Press Adjustment on the MACHINE screen to display the Adjustment Menu screen.
Press Quality Adjustment and Density Balance Auto. Adj. in sequence.
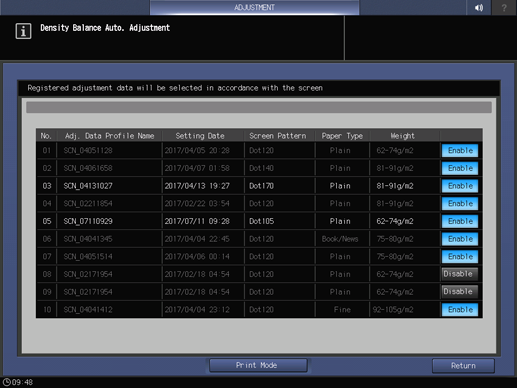
Press Print Mode.
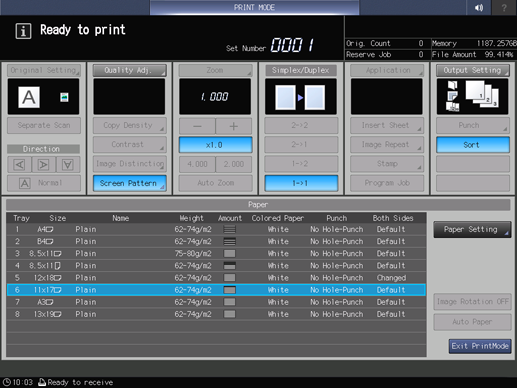
Press Quality Adj..
Press right on the right side of Screen Pattern to display the desired screen.
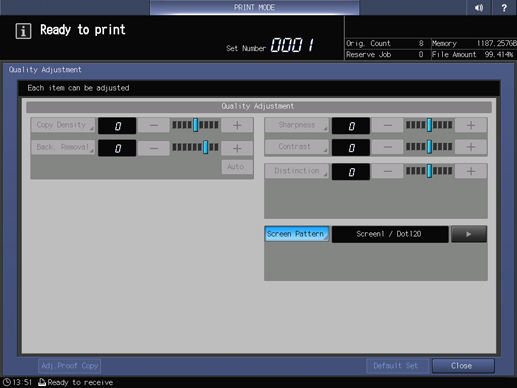
supplementary explanationIf necessary, you can press Screen Pattern to display the Screen Pattern screen and select any screen. Select a screen, and press OK.
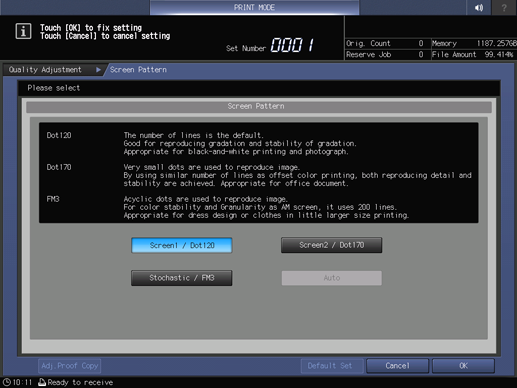
supplementary explanationPress Close on the Quality Adjustment screen.
Select a paper size for the chart.
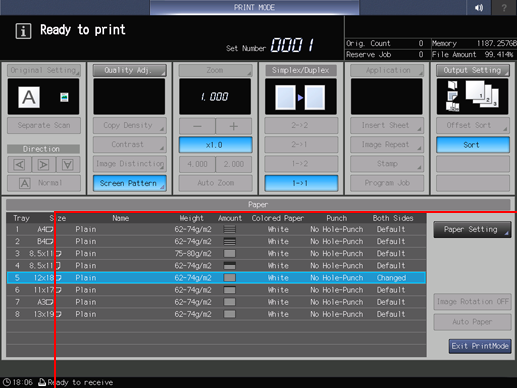
supplementary explanationLoad paper of A3 short edge feed, 11 17 short edge feed, 12 18 short edge feed, or SRA3 short edge feed into the tray, and select the button of the tray.
Press Start on the control panel.
Charts are output, and the Density Balance Auto. Adjustment Result screen is displayed.

Press Return to return to the Quality Adjustment Menu screen.
When Integrated Color Care Unit IQ-501 is not provided (with the scanner (Original Glass):
Output the density balance chart from the machine to carry out colorimetry using the scanner function.
Press Adjustment on the MACHINE screen to display the Adjustment Menu screen.
Press Quality Adjustment and Density Balance Auto. Adj. in sequence.

Press Output Chart.
Press Quality Adj..
Press right on the right side of Screen Pattern to display the desired screen.

supplementary explanationIf necessary, you can press Screen Pattern to display the Screen Pattern screen and select any screen. Select a screen, and press OK.
supplementary explanationPress Close on the Quality Adjustment screen.
Select a paper size for the chart.

supplementary explanationLoad paper of A3 short edge feed, 11 17 short edge feed, 12 18 short edge feed, or SRA3 short edge feed into the tray, and select the button of the tray.
Press Start on the control panel.
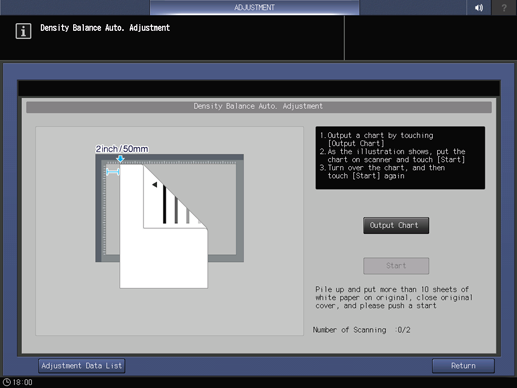
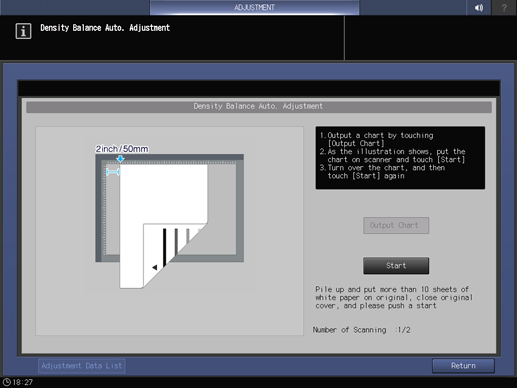
Charts are output, and the Density Balance Auto. Adjustment screen is displayed.
Load the output test chart on the Original Glass as shown in the example on the screen.
supplementary explanationTurn the arrow mark of the test chart to the back, then face the print side downward.
supplementary explanationTake the test chart away from the vertical size guide by 2 inches (5 cm), then push it against the horizontal size guide to load the test chart.
supplementary explanationPlace about 10 sheets of blank copy paper on the test chart.
supplementary explanationClose the ADF.

Press Start on the screen.
The first scan is carried out.

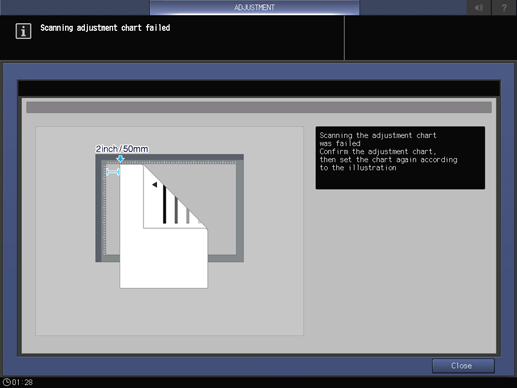
supplementary explanationIf an error is detected, the error message shown below is displayed. Referring to the displayed message, rectify the error.
Reverse the top and bottom of the scanned test chart, then load it on the Original Glass.
supplementary explanationTurn the arrow mark of the test chart forward, then face the print side downward.
supplementary explanationTake the test chart away from the vertical size guide by 2 inches (5 cm), then push it against the horizontal size guide to load the test chart.
supplementary explanationPlace about 10 sheets of blank copy paper on the test chart.
supplementary explanationClose the ADF.
Press Start on the screen.
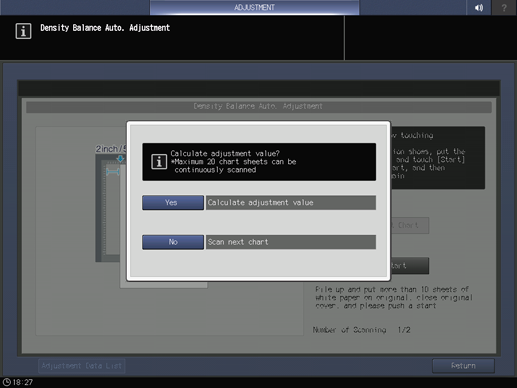
The second scan is carried out, and the density balance adjustment value is registered.

When the adjustment is completed normally, the adjustment value is automatically registered, and the screen shown below is displayed. Select whether to output the adjustment chart for confirmation purposes.
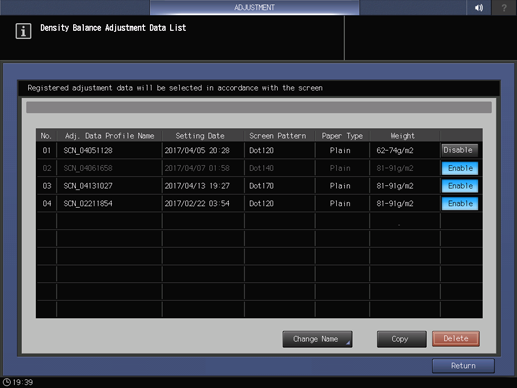
supplementary explanationThe adjustment value is registered according to the following conditions.
When the there is an idle registration:
The adjustment value is registered in the lowest idle number.
When the there is no idle registration:
The adjustment value is overwritten to the number that matches the following conditions.
If multiple values match the conditions, they are overwritten preferentially from the condition of a low number.
(1) Adjustment value of same screen, same paper type, same weight, and old date
(2) Adjustment value of same screen, same paper type, and old date
(3) Adjustment value of same screen and old date
(4) Adjustment value of oldest date
supplementary explanationIf Yes is selected, you can output a check chart.
After the chart is output, follow the procedure to scan the chart; the values before and after adjustment are indicated by a graph, and the Density Balance Auto. Adjustment Result is displayed.

supplementary explanationIf No is selected, the adjustment value registration screen below is displayed.
Press Return to return to the Density Balance Auto. Adjustment screen.
Press Return to return to the Quality Adjustment Menu screen.