
Scan/Fax Transmission Option Settings
- Scanning a 2-sided original (Simplex/Duplex)
- Selecting the appropriate image quality level for the original (Original Type)
- Specifying the resolution to scan the original (Resolution)
- Adjusting the density to scan the original (Density)
- Specifying the file type of the scanned original (File Type)
- Selecting the color mode to scan the original (Color)
- Specifying the original size (Scan Size)
- Adjusting the background density of the original to be scanned (Bkgrd. Removal)
- Specifying the original loading direction (Original Direction)
- Specifying the original binding position (Binding Position)
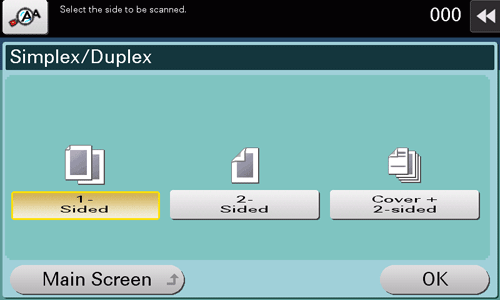
Scanning a 2-sided original ([Simplex/Duplex])
Using the ADF, you can automatically scan the front and back sides of an original. Also, you can scan only one side of the first page, then scan both sides of the remaining pages.
Tap [Scan Settings] - [Simplex/Duplex].
Setting
Description
[1-Sided]
Scans one side of an original.
[2-Sided]
Scans both sides of an original.
[Cover + 2-sided]
Scans only one side for the first page in the original, and scan both sides of the remaining pages.

To scan a 2-sided original, specify the correct original loading direction. For details, refer to Here.
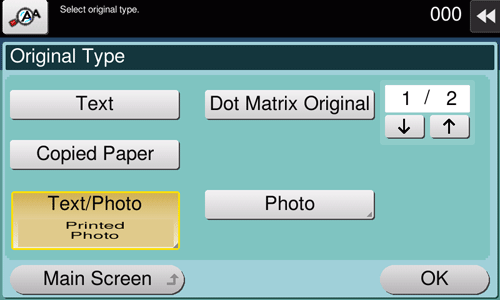
Selecting the appropriate image quality level for the original ([Original Type])
Select the optimum settings for the original to scan it in the optimum image quality.
Tap [Scan Settings] - [Original Type].
Setting
Description
[Text]
Scans an original that consists primarily of text at the optimum level of image quality.
This function sharpens the edges of each character, creating easy-to-read images.
[Dot Matrix Original]
Scans an original, which consists primarily of text such as thin or faint characters, at the optimum image quality level.
This function reproduces text using high pixel density, creating easy-to-read text.
[Copied Paper]
Scans an original, which is output with an even density from the copier or printer, at the optimum level of image quality.
[Text/Photo]
Scans an original consisting primarily of text and photos at the optimum image quality level.
This function sharpens the edges of each character and reproduces smoother photos.
[Photo Paper]: Select this option to scan an original that contains photos printed on photographic paper.
[Printed Photo]: Select this option to scan the printed original such as a brochure or catalog.
[Photo]
Scans an original consisting of only photos at the optimum image quality level.
[Photo Paper]: Select this option to scan an original printed on photographic paper.
[Printed Photo]: Select this option to scan the printed original such as a brochure or catalog.
[Contract]
Reduces the file size when scanning the original such as a contract or bar code in black and white.
If [Contract] is selected, [Color] is synchronously changed to [Black].
This option is available when the file type is set to TIFF, PDF, or XPS.
Specifying the resolution to scan the original ([Resolution])
Select a resolution to use to scan the original.
Tap [Scan Settings] - [Resolution].

Setting
Description
[Scan Resolution]
Select the resolution of the original for scan transmission.
When using Scan to E-mail, SMB Send, FTP Send, WebDAV Send, or Save in User Box, select the following resolution to scan an original.
[200 200 dpi]: Select this option to scan a standard original.
[300 300 dpi]: Select this option to scan a standard original at a higher resolution.
[400 400 dpi]: Select this option to scan an original containing small characters and drawings.
[600 600 dpi]: Select this option to convert an original into a file of the maximum size. Select this option to scan an original such as a full color photo with a fine image quality level.
[Fax Resolution]
Select the resolution of the original for sending a fax.
When using fax transmission, Internet fax transmission, or IP address fax transmission, select the following resolution to scan an original.
[Normal]: Select this option to scan originals that do not require a fine level of image quality, or when you want to send a large number of originals quickly.
[Fine]: Select this option to scan a standard original.
[Super Fine]: Select this option to scan originals containing small characters or drawings.
[Ultra Fine]: Select this option to scan originals that require a fine level of image quality.
The finer the scan resolution is, the larger the data volume becomes, resulting in longer transmission time. To send data as an E-mail attachment or to a server, make sure that the data volume does not exceed the limit.
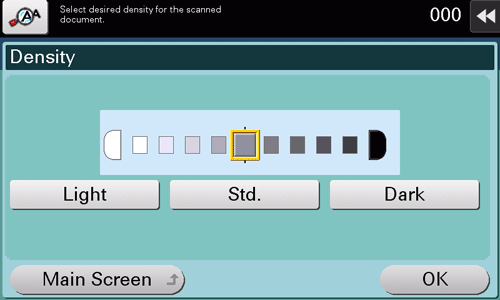
Adjusting the density to scan the original ([Density])
Adjust the density (Dark or Light) to scan the original.
Tap [Scan Settings] - [Density] to adjust the density to scan the original.
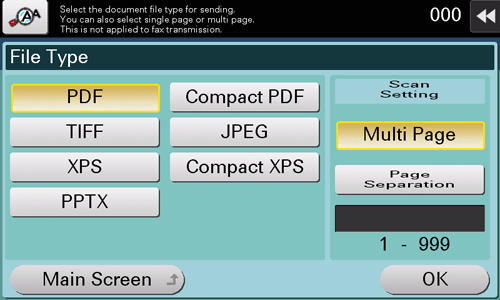
Specifying the file type of the scanned original ([File Type])
The available file types are PDF, TIFF, JPEG, XPS, PPTX, DOCX, XLSX, and other types. You should use the password encrypted PDF file format to store important original data.
Tap [Scan Settings] - [File Type].
Setting
Description
[File Type]
Select the file type to be saved from the following:
[PDF]: A type available in most operating systems, which enables you to assign a password to a file or encrypt a file. Important original data should be saved as a PDF file.
[Compact PDF]: Saves a file with a smaller size than normal PDF format. We recommend this format when you want to reduce file size to enable sending by E-mail etc.
[TIFF]: This is one kind of versatile image formats. TIFF format supports multiple pages, in which multi-page documents can be saved as single file.
[JPEG]: A file format widely used in digital cameras. Suitable for saving photo data. JPEG format does not support the saving of multiple pages as a single file.
[XPS]: Extension of an XML-base file that is applied in Windows. You can install the XPS viewer to view or print data even if the source application is not provided.
[Compact XPS]: Saves a file with a smaller size than normal XPS format.
[PPTX]: Extension of an XML-base file that is created using PowerPoint of Microsoft Office.
[DOCX]: Extension of an XML-base file that is created using Word of Microsoft Office.
[XLSX]: Extension of an XML-base file that is created using Excel of Microsoft Office.
[Scan Setting]
Select a filing page unit when an original consists of multiple pages.
[Multi Page]: Converts all pages to a single file. However, if [File Type] is set to [JPEG], you cannot select [Multi Page].
[Page Separation]: Divides a file into a specified number of pages for transmission using E-mail, SMB, or FTP transmission. For example, if you enter "2" to scan 10 original pages, the original is divided into five separate files. The specified number of pages is stored and the pages are saved as a single file ([Multi Page]) in a User Box. Pages are converted as a single file by the specified number of pages.
To specify DOCX or XLSX for the file type, the option is required. For details on the required option, refer to Here.
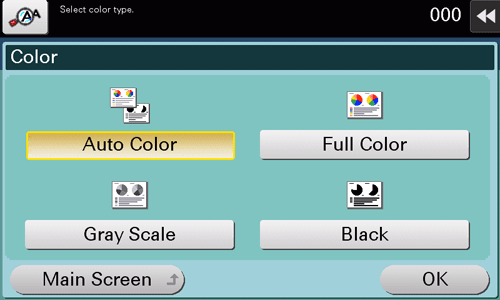
Selecting the color mode to scan the original ([Color])
Select a color mode for scanning originals.
Tap [Scan Settings] - [Color].
Setting
Description
[Auto Color]
Automatically determines [Full Color] or [Gray Scale] to fit the original color when scanning the original.
[Full Color]
Scans in full color regardless of whether the original is in color or in black and white.
Select this option to scan originals of other than black and white and scanning color photos.
[Gray Scale]
Scans in gray scale regardless of whether the original is in color or in black and white. Select this option to scan originals with many halftones, such as black and white photos.
[Black]
Scans an original in black or white without using gray scales.
Select this option to scan originals with distinct black and white areas, such as line drawings.
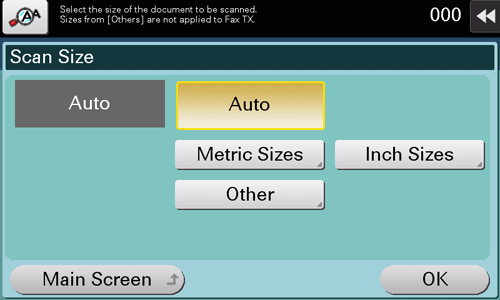
Specifying the original size ([Scan Size])
Select the size of the original to be scanned.
Tap [Scan Settings] - [Scan Size].
Setting
Description
[Auto]
Automatically selects the size to fit the original when scanning.
[Metric Sizes]
Select a standard metric size.
[Inch Sizes]
Select a standard inch size.
[Other]
Select this option to scan a postcard or an original other than a metric- or inch-size original. Tapping [Other] enables you to select each standard size.
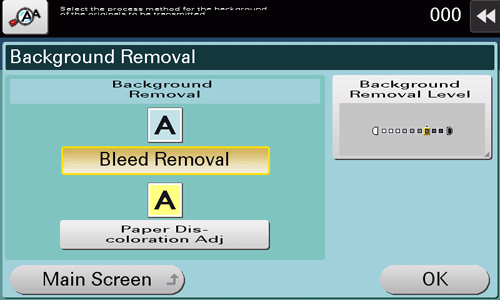
Adjusting the background density of the original to be scanned ([Bkgrd. Removal])
You can adjust the density of the background area when printing originals with colored background (newspapers, recycle paper, etc.), or originals that are so thin that text or images on the back would be scanned.
Tap [Scan Settings] - [Bkgrd. Removal].
Setting
Description
[Background Removal]
Scans a 2-sided original made of thin paper or an original with the colored background, with the optimum image quality.
[Bleed Removal]: Select this option to prevent bleeding of the back of the paper when printing a 2-sided original that is so thin that the contents of the back side would be scanned.
[Paper Discoloration Adj]: Select this option to scan an original with a colored background such as a map.
[Bkgd. Removal Level]
Adjusts the density of the background color for an original with a colored background. Selecting [Auto] automatically determines the density of the background color, and scans an original at the optimum background density level.
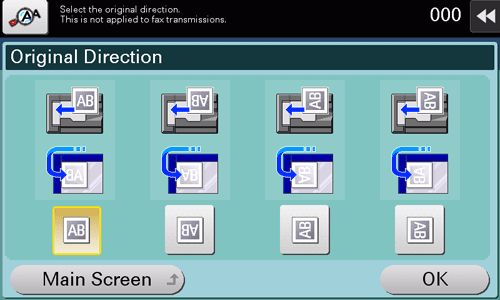
Specifying the original loading direction ([Original Direction])
When scanning a 2-sided original, specify the original loading direction so that the vertical direction of the scanned original is set correctly.
Tap [Scan Settings] - [Original Settings] - [Original Direction] to specify the original loading direction.
Specifying the original binding position ([Binding Position])
Specify the binding position to suit the orientation of the target original.
Tap [Scan Settings] - [Original Settings] - [Binding Position].
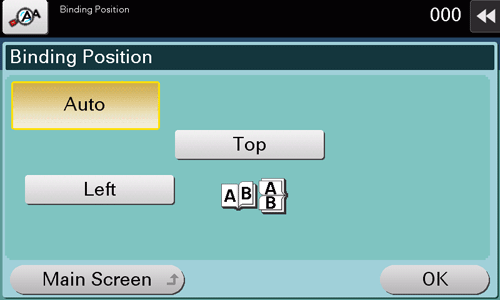
Setting
Description
[Auto]
Automatically configures the binding position of the original.
When the long side of the original is 11-11/16 inches (297 mm) or less, the binding position is set to the long side of the paper.
When the long side of the original exceeds 11-11/16 inches (297 mm), the binding position is set to the short side of the paper.
[Left]
Select this option when the binding position is set to the left of the original.
[Top]
Select this option when the binding position is set to the top of the original.