
Printing Highly Confidential Documents ([Secure Print])
About Secure Print
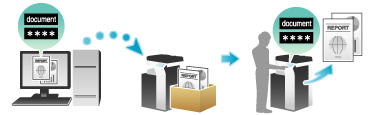
Secure Print is a function that assigns document ID and password to print data and saves the data to the Secure Print User Box of this machine. This function does not print data immediately, thereby preventing printed materials from being missing or left.
You need to enter the document ID and password on the screen of this machine to print the data saved in a User Box. Therefore, this function is particularly suitable for safely printing highly confidential documents.

Enabling simple printing for secure print document (for the administrator)
If simple printing for secure print document is enabled, the computer login name is used as the document ID for Secure Print, so you can skip the entry of the document ID.
Also, if the computer login name is used as the document ID for Secure Print, it prevents the document ID from being duplicated with that of another user, which simplifies document management on this machine.
When making prints on the machine, the user can display a list of document IDs on the screen of this machine and easily specify the target document ID.
To enable simple printing of secure documents, configure the following settings.
Enable simple printing of secure documents on this machine (default: [Do Not Release Secure Print]). For details on the setting procedure, refer to Here.
In [Device Option] of the [Configure] tab on the printer drive, set [Security Document Setting] to [Release Secure Print] (default: [Do Not Release Secure Print]). For details on [Device Option], refer to Here.

When simple printing is disabled, the document ID can be specified using up to 16 characters. If simple printing is enabled, the document ID can be extended to up to 64 characters.
If simple printing is changed from Enable to Disable while the document ID is specified using 17 or more characters, it will cause document operations to fail.
Setting Secure Print on your computer
A single job enables you to print out a document of up to 2999 pages in length.
In [Output Method] in the [Basic] tab, select [Secure Print].
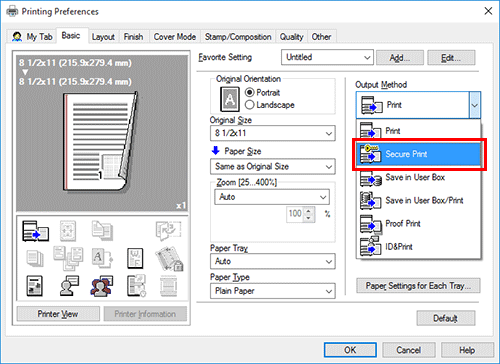
Enter the document ID and password, then click [OK].
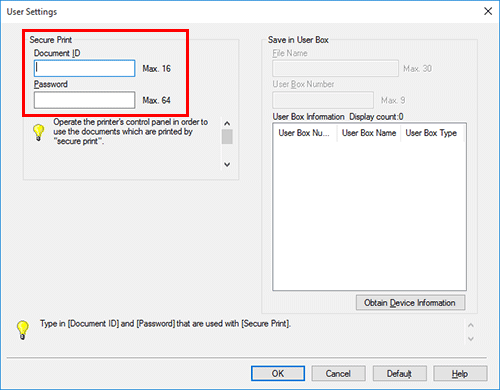
If you always use the same document ID and password, registering them in advance eliminates the need to enter them each time. For details, refer to Here.
Execute printing.
The data is saved in the Secure Print User Box. Then, proceed to "Printing a Secure Print job on this machine".
You can issue a print instruction from the screen of this machine before print data scanning on this machine is completed. However, printing is executed after print data scanning on this machine has been completed.
Printing a Secure Print job on this machine
Data printed using the Secure Print function is saved in the Secure Print User Box. To print the saved data, you need to enter the document ID and password specified in the printer driver.
For details on the printing procedure, refer to Here.